How to Choose the Right LED Beam Angle for Architectural Lighting: GU10, MR16 & AR111 Guide
Uneven walls. Hot spots on the floor. Glare in people’s eyes.
Most “bad lighting” problems in architectural projects come down to one thing: the wrong beam angle.
For architectural spotlights like GU10, MR16 and AR111, beam angle decides where the light goes, how strong it looks on the surface, and how many fittings you actually need. Get it right, and you get clean, intentional light with fewer watts and fewer fixtures. Get it wrong, and you pay for it in rework, complaints, and energy waste.
This guide walks through the practical side of beam angles for architectural work – what they are, how they behave at different mounting heights, and how to choose correctly for real projects, without referencing any specific brands.
1. Beam Angle Basics – What You’re Actually Specifying

1.1 What is beam angle?
In architectural lighting, beam angle is defined as the angle between the two directions where the luminous intensity falls to 50% of the maximum in the centre of the beam. That’s the definition used in IES and CIE photometry for beam distributions.
(See IES TM-15 and CIE publications on beam distribution definitions:
– Illuminating Engineering Society: https://ies.org
– International Commission on Illumination (CIE): https://cie.co.at)
In simple terms: beam angle defines how tight or wide the light cone is.
- Narrow beam (≈10–20°): tight spot, high intensity on a small area.
- Medium beam (≈24–40°): typical accent or task beam.
- Wide beam (≈60–120°): flood or general ambient.
Many manufacturers also publish field angle, typically measured at 10% of peak intensity. Field angle is always wider than beam angle and tells you more about the “soft edge” of the light.
1.2 Beam angle vs. light level on the surface
For a given lumen package, narrow beams deliver higher lux on the target surface; wide beams spread the same lumens over a larger area.
At a fixed mounting height, you can approximate the diameter of the beam on the floor or wall:
Beam diameter ≈ 2 × (mounting height) × tan(beam angle ÷ 2)
You don’t need to do the trigonometry on site – most lighting calculation software (Dialux, Relux, AGi32) incorporates this automatically using full IES or EULUMDAT files. But understanding the relationship helps you sense-check results.
1.3 Typical beam-angle ranges
Different lamps and modules naturally tend to sit in certain ranges:
| Classification | Typical Beam Angle | Typical Use Case |
|---|---|---|
| Very narrow spot | 8–15° | High-ceiling accents, columns, sculptures |
| Narrow spot | 15–24° | Object accent, retail highlights |
| Spot | 24–36° | General accent, feature walls |
| Flood | 36–60° | Small rooms, circulation spaces |
| Wide flood | 60–90° | Low-ceiling ambient |
| Very wide / diffuse | 90–120° | Indirect or diffuse general lighting |
These ranges are consistent with many commercial photometry libraries and with how the IES Lighting Handbook categorises beam types.
2. Why Beam Angle Matters in Architectural Lighting

2.1 Aesthetics and composition
Architectural lighting is less about “enough lumens” and more about where the luminance is placed:
- Narrow beams create contrast and focus: niche walls, artworks, texture on stone, feature niches.
- Medium beams define zones: tables, seating areas, displays.
- Wide beams build the base layer of brightness and visual safety.
The human visual system is highly sensitive to contrast and bright patches in the field of view. Poor beam selection is one of the fastest ways to create glare and visual discomfort, even if the average lux level is correct.
Standards like EN 12464-1 for indoor workplaces emphasise both illuminance levels (lux) and uniformity for visual comfort and safety:
https://standards.iteh.ai/catalog/standards/cen/7e8f4fab-2f27-4ac5-bdb9-53e97961e84a/en-12464-1-2021
2.2 Energy and fixture count
Beam angle directly impacts:
- How many fittings you need to hit required lux.
- How efficiently each watt is used on the actual target (floor, product, artwork, facade) instead of spilling onto ceilings and empty walls.
Choosing an angle that matches the task typically allows you to:
- Reduce over-lighting and cut connected load.
- Avoid adding extra fixtures later to “fill dark spots.”
2.3 Glare and visual comfort
Glare is influenced by luminance in the field of view, mounting height, and direction. Narrow beams aimed carelessly at eye level can easily exceed comfort thresholds.
Metrics like Unified Glare Rating (UGR), defined by the CIE, are used to evaluate discomfort glare in indoor environments:
https://cie.co.at/publications/discomfort-glare-interior-lighting
Beam angle doesn’t appear directly in the UGR formula, but it affects the apparent luminance und size of the bright area, which strongly influence the result. For low glare:
- Avoid narrow beams at low mounting heights aimed across seating areas.
- Use wider beams or shielded optics when luminaires are in direct view.
3. Comparing GU10, MR16 and AR111 for Architectural Use
The three most common format families for architectural spot lighting – GU10, MR16 and AR111 – each sit in a different sweet spot of beam angle, mounting style and application.
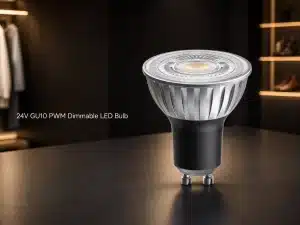
3.1 GU10 – Compact mains-voltage spot
- Base: GU10 twist-and-lock.
- Power: Typically 4–7 W LED for 35–50 W halogen replacement.
- Common beam angles: roughly 24°, 36°, 40°, sometimes 10–15° or 60° variants.
Typical uses:
- Low to medium ceiling (2.5–3.5 m) accent lighting.
- Tracks, adjustable downlights, small feature ceilings.
- Retrofits where existing GU10 halogens were used.
3.2 MR16 – Low-voltage versatility
- Form factor: 50 mm diameter multifaceted reflector (MR).
- Base: Most commonly GU5.3 (12 V).
- Beam options: from very narrow (10–15°) to wide floods (60°+), depending on optics.
Typical uses:
- Recessed downlights in hospitality and residential.
- Accent lighting where low voltage is preferred.
- Retrofits with existing MR16 infrastructure.
3.3 AR111 – Large-aperture architectural accent
- Diameter: ~111 mm.
- Beam options: common ranges from 8–12° very narrow, through 24–40° spots, up to 60° floods.
- Output: often higher lumen packages suited to tall spaces.
Typical uses:
- Double-height lobbies.
- Retail feature walls, window displays.
- Museum, gallery, and facade grazing from longer throws.
3.4 Quick comparison table
| Parameter | GU10 | MR16 | AR111 |
|---|---|---|---|
| Durchmesser | ~50 mm | ~50 mm | ~111 mm |
| Typical voltage | 220–240 V (or 120 V) | 12 V (with driver/transformer) | 220–240 V (or 120 V), some LV |
| Typical beam range | 24–60° | 10–60° | 8–60° |
| Best use | Low/medium ceilings, retrofits | Recessed/tunable ceiling layouts | Long-throw accents, high ceilings |
| Mounting | Track, surface, recessed | Recessed, track | Gimbal, tracks, surface multiples |
(Geometries and use-cases are broadly aligned with common MR and AR reflector standards, e.g. IEC lamp caps and holder standards: https://webstore.iec.ch)
4. How to Select the Right Beam Angle – A Practical Method

Rather than guessing, you can treat beam angle selection as a simple process:
- Define task and visual emphasis.
- Note mounting height and distance to target.
- Decide target size (table, painting, column section, wall panel).
- Choose beam angle so the beam just covers the target with a bit of overlap.
- Verify in a quick calculation or simulation.
4.1 Step 1 – Decide what you are lighting
Common architectural lighting goals:
- Task surfaces: worktops, reception desks, conference tables.
- Verticals: feature walls, shelving, merchandise, artwork.
- Architectural elements: columns, arches, niches, textures.
- Ambient layer: general brightness to meet safety/standard lux levels.
Beam angle should follow the size and nature of the target, not the fixture catalogue order.
4.2 Step 2 – Account for mounting height
Higher mounting heights require either wider beams to maintain coverage, or higher output / narrower beams if you need strong accents from a distance.
Approximate “rule of thumb” beams vs height for typical architectural use:
| Mounting Height | Accent on Small Feature (0.5–1 m wide) | Accent on Medium Feature (1–2 m wide) | General Area Lighting |
|---|---|---|---|
| 2.5–3 m | 15–24° | 24–36° | 36–60° |
| 3–4 m | 10–20° | 20–30° | 40–60° |
| 4–6 m | 8–15° | 15–24° | 30–40° (plus uplight) |
Use these as starting points, then refine in software.
4.3 Step 3 – Balance contrast vs uniformity
Standards such as EN 12464-1 and IES recommendations emphasise both average illuminance und uniformity on task areas. For many interior applications:
- Offices: 300–500 lux on workplanes, with uniformity ≥ 0.6.
- Retail: 300–1000 lux, with higher contrast on merchandise.
- Museums/galleries: strong contrast is encouraged, but with careful glare control.
Referenzen:
– EN 12464-1 (Indoor workplace lighting): see European standards listings.
– IES Lighting Handbook: https://ies.org
In practice:
- Verwendung narrower beams for highlight layers (1:3–1:10 contrast vs ambient).
- Verwendung wider beams or indirect light for ambient, so that the eye isn’t constantly jumping between very bright and very dark areas.
5. Typical Beam Angle Choices by Application

Below are practical examples that specifiers often converge on in architectural work. Numbers are indicative – always confirm with photometry and local codes.
5.1 Lobby and reception
Goals: welcoming atmosphere, clear wayfinding, emphasis on reception desk and features.
Typical choices:
-
Ceiling height 3–4 m
- General ambient: 40–60° MR16 or GU10 downlights.
- Desk highlight: 20–30° spots aimed at counter.
- Feature wall / logo: 15–24° spots.
| Element | Suggested Source | Strahlwinkel | Notes |
|---|---|---|---|
| Reception desk | GU10 / MR16 | 20–30° | Aim from 25–35° off vertical |
| Feature wall | AR111 or MR16 | 15–24° | Overlap beams slightly |
| Ambient ceiling | GU10 / MR16 | 40–60° | Keep UGR within comfort range |
5.2 Offices and meeting rooms
Goals: compliance with lux levels, low glare, flexibility.
- Workplane targets (per EN 12464-1): 300–500 lux with good uniformity.
- Beam angle is usually medium to wide; accent layers are optional.
Typical:
- 60–90° beams in recessed or track luminaires for general lighting.
- Narrow accents (24–36°) only on specific surfaces (whiteboards, artwork).
5.3 Retail and hospitality
Goals: strong contrast on products, comfortable ambient for customers.
- Merchandise: 15–30° beams (GU10, MR16, AR111) depending on mounting height.
- Ambient: 40–60° beams, often with softer diffuse optics.
| Area | Mounting Height | Recommended Beam | Type |
|---|---|---|---|
| Wall bays | 3 m | 15–24° | GU10 / AR111 |
| Central displays | 3–4 m | 20–30° | MR16 / AR111 |
| General ambient | 2.8–3.2 m | 40–60° | MR16 / panel |
Lighting research (e.g., IES retail lighting guidance and CIE technical reports on museum/retail lighting) shows that vertical illuminance and contrast significantly influence perceived brightness and merchandise appeal:
– IES RP-2 (Lighting for retail spaces): https://ies.org
– CIE publications on lighting for museums and galleries: https://cie.co.at
5.4 Museums and galleries
Goals: precise highlighting, controlled contrast, protection of sensitive materials.
- Narrow beams (8–15°) for small objects.
- 15–24° for paintings and large framed works.
- Strict glare control to avoid reflected highlights on glass.
Beam angle works together with illuminance limits und spectral control informed by conservation guidelines (e.g., CIE 157 and museum lighting recommendations).
5.5 Facades and exterior accents
Goals: sculpt the building at night, avoid light trespass and sky glow.
- AR111 or dedicated outdoor spot modules used with 8–40° beams for columns, pilasters and verticals.
- 30–60° beams for general wall washing – sometimes asymmetric beams or grazing optics.
For exterior lighting, reference standards like CIE 150 (Guide on the Limitation of the Effects of Obtrusive Light):
https://cie.co.at/publications/guide-limitation-effects-obtrusive-light-outdoor-lighting-installations-2nd-edition
6. Common Mistakes in Beam Angle Selection (and How to Avoid Them)
Mistake 1 – Designing by lumen, not by task
Selecting fixtures only by lumen output, without considering beam angle, often leads to:
- Overlit hot spots directly under fixtures.
- Dark patches between fittings.
Fix: always start from the target area und erforderliche Beleuchtungsstärke, then choose beam angle and lumen package together.
Mistake 2 – Ignoring height and offset
Using the same beam angle for 2.5 m and 5 m ceiling heights gives completely different results:
- At double the height, the same beam covers roughly twice the diameter and delivers about ¼ of the lux (inverse-square behaviour of illuminance).
Fix: adjust beam angle or output according to mounting height, and verify with quick calculations or software.
Mistake 3 – Overusing very narrow beams
Very narrow beams look powerful in a dark sample room but can be:
- Unforgiving to aiming errors.
- Highly glaring if within normal viewing angles.
Fix: reserve 8–15° beams for high ceilings or very discrete accents where you can carefully aim and shield; otherwise start around 20–30° for accent work.
Mistake 4 – Mixing incompatible distributions
Even with the same nominal beam angle, different optics can have very different:
- Peak-to-field ratios (strong centre vs soft centre).
- Spill light and glare behaviour.
Fix: for critical spaces, use the same optical family or photometry from a single range so distributions blend well. Always read the intensity distribution curves in the IES/EULUMDAT files.
Mistake 5 – No attention to vertical illuminance
Designs that only hit the horizontal lux targets (on floors or desks) can feel “flat”.
Visual brightness in architecture is driven heavily by vertical surfaces – walls, faces, merchandise. Many standards and guides (IES, CIE) now emphasise vertical illuminance for perception and safety (e.g., for faces in offices and schools).
Fix: allocate beam angles and aiming so that walls and vertical elements receive adequate light. This often means using medium beams aimed at walls in addition to general downlighting.
7. A Simple Workflow for Specifying Beam Angles
For architectural projects using GU10, MR16 or AR111, you can adopt a consistent workflow:
-
List spaces and tasks
- For each room/zone, note use, ceiling height, key surfaces (tables, walls, displays).
-
Set lighting targets
- Use EN 12464-1, IES recommendations or local standards to define target lux and uniformity for each area.
-
Choose lamp family and mounting
- GU10 for compact retrofits and low ceilings.
- MR16 for flexible recessed schemes.
- AR111 for high ceilings or long throws.
-
Select provisional beam angles
- Use the height/beam tables in this guide as starting points.
- Decide which surfaces are accent vs ambient.
-
Run quick calculations
- Load IES/EULUMDAT files into Dialux, Relux, AGi32 or similar.
- Adjust beam angles and aiming until vertical and horizontal lux targets and contrast ratios are acceptable.
-
Check glare and comfort
- For office- and workplace-type areas, verify UGR and uniformity against EN 12464-1 and CIE guidelines.
- Adjust mounting and optics if UGR is too high.
-
Mock up critical areas
- For high-value spaces (entrance, feature walls, flagship retail), build a small on-site or showroom mockup with candidate beam angles to validate the design visually.
-
Document choices clearly
-
On drawings and schedules, include:
- Lamp type (GU10 / MR16 / AR111)
- Beam angle (e.g., 24°, 36°)
- Mounting height and aiming notes
- This avoids substitutions that accidentally change beam behaviour.
-
Schlussfolgerung
Beam angle is one of the most powerful – and most misunderstood – tools in architectural lighting.
When you treat GU10, MR16 and AR111 not just as “lamp types” but as beam delivery tools, you can:
- Shape spaces with intentional contrast.
- Hit lux and uniformity targets with fewer watts and fewer fittings.
- Reduce glare and visual fatigue for occupants.
- Avoid expensive re-aiming and retrofits after handover.
Start from the task, respect the physics of height and distribution, and use standards and photometric data as your reference. With that approach, beam angle selection becomes a clear, repeatable part of your design process instead of guesswork – and your projects will look and perform better for it.