Réponse rapide : 24° vs 36° — lequel est meilleur ?

- faisceau 24° → intensité plus élevée, éclairage focalisé, contraste plus fort
- faisceau 36° → couverture plus large, meilleure uniformité, moins de luminaires
À 3m de hauteur, 36° couvre ~50–70% plus de surface que 24°
Conclusion :
Utiliser 24° pour l'éclairage d'accentuationet 36° pour l'éclairage général dans la plupart des projets commerciaux.
Points clés à retenir
- 24° = lux élevé + forte focalisation
- 36° = large couverture + meilleure uniformité
- 24° améliore la visibilité des produits
- 36° réduit la quantité de luminaires
- Mélanger les deux donne les meilleurs résultats
Pourquoi 24° et 36° sont les angles de faisceau les plus utilisés
Réalité sur site
Dans les environnements commerciaux (commerce de détail, hôtellerie) :
- les hauteurs de plafond varient généralement 2,5–4 m
- le temps d'installation est limité
l'approvisionnement doit être standardisé
24° et 36° sont les options les plus pratiques et les plus largement disponibles.
Explication technique
Selon les classifications de faisceau IES :
- 24° → faisceau spot (<30°)
36° → flood étroit (30–40°)
Référence :
https://www.ies.org/standards/
Ces angles offrent un équilibre optimal entre :
- intensité lumineuse
- zone de couverture
- flexibilité d'espacement
Perspective Directe d'Usine
Dans les grands projets d'hôtellerie :
- sur 60% des commandes sont 24° ou 36°
- en raison de la compatibilité avec les systèmes de rail et les commandes de gradation
24° vs 36° : Différences clés en un coup d'œil
| Fonctionnalité | Faisceau 24° | Faisceau 36° |
|---|---|---|
| Étalement du faisceau | Étroit | Moyen |
| Intensité lux | Haut | Moyen |
| Couverture | Petit | Grand |
| Uniformité | Inférieur | Plus élevé |
| Quantité de luminaires | Plus | Moins |
| Meilleure utilisation | Éclairage d'accentuation | Éclairage général |
Qualité de l'ombre : Une différence visuelle clé
L'angle du faisceau affecte non seulement la luminosité, mais apparence des objets.
- faisceau 24° → ombres nettes et définies
- faisceau 36° → ombres douces et diffusées
Impact pratique :
- 24° → idéal pour bijoux, montres, matériaux texturés
36° → mieux adapté pour vêtements, hôtellerie, éclairage d'ambiance
Idée clé :
Les faisceaux étroits créent de la profondeur et du contraste, tandis que les faisceaux plus larges améliorent le confort visuel.
Formule du diamètre du faisceau (Outil de conception)
Calcul de la largeur du faisceau
Largeur du faisceau = 2 × hauteur de montage × tan(angle du faisceau ÷ 2)
Exemple (plafond de 3 m)
- 24° → ~1,27 m de diamètre
36° → ~1,95 m de diamètre
36° offre une couverture nettement plus large.
Référence (test photométrique) :
https://www.ies.org/standards/lm-79/
Comparaison de l'étalement du faisceau (Différence de couverture)
| Hauteur | Couverture 24° | Couverture 36° |
|---|---|---|
| 2,5 m | ~1,06 m | ~1,62 m |
| 3 m | ~1,27 m | ~1,95 m |
Idée clé :
De petits changements dans l'angle du faisceau créent de grandes différences dans la distribution de la lumière.
Comparaison Lux : Lequel est le plus lumineux ?

Avec un flux lumineux identique :
- 24° → concentré → lux plus élevé
- 36° → diffusé → lux plus faible
Exemple (800 lm @ 3 m)
- 24° → ~1800 lux
- 36° → ~900 lux
CBCP (Puissance lumineuse au centre du faisceau)
Le CBCP mesure l'intensité maximale au centre du faisceau.
- 24° fournit généralement 30–50% CBCP plus élevé
crée une focalisation visuelle plus forte
En éclairage commercial, un CBCP plus élevé fait mieux ressortir les produits.
Référence :
https://cie.co.at/publications
Différences d'espacement dans les installations réelles
Selon les directives IES :
https://www.ies.org/handbook
| Hauteur | Espacement 24° | Espacement 36° |
|---|---|---|
| 2,5 m | ~2,0 m | ~3.0m |
| 3 m | ~2.4m | ~3.6m |
Impact pratique :
- 36° reduces fixture count by 30–40%
- lowers installation and wiring cost
- improves overall uniformity
Warning: Beam Angle vs Ceiling Height
If ceiling height exceeds 3.5m:
- 36° beams may not deliver sufficient lux
- lighting becomes flat and underpowered
Recommendation:
- Utiliser 24° or narrower beams
- especially for accent or vertical lighting
This is one of the most common mistakes in commercial projects.
Manufacturer Insight: Common Real-World Mistake
In many retail projects:
Clients choose 36° beams to reduce fixture quantity.
Résultat :
- poor contrast
- weak product focus
- reduced visual impact
Our recommendation:
- Utiliser 24° beams for key areas
- combine with 36° for ambient lighting
Glare Control Consideration
- 24° beams usually offer better glare control
36° beams may produce more spill light if optics are poor
High-quality lens design is critical.
When to Use 24° Beam Angle
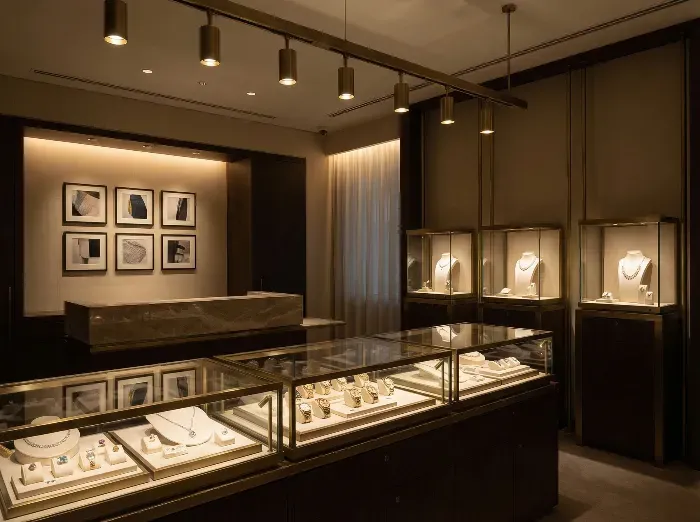
Use 24° when you need:
- accent lighting
- high contrast
- focused illumination
Applications :
- présentoirs de vente au détail
- artwork lighting
- reception areas
Target: >1000 lux
When to Use 36° Beam Angle
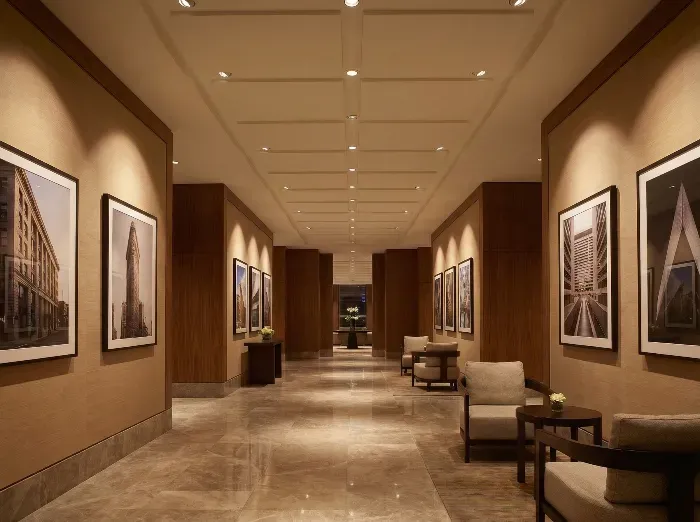
Use 36° when you need:
- general lighting
- uniform distribution
- fewer fixtures
Applications :
- corridors
- halls d'hôtel
- open commercial areas
Target: 500–800 lux
Application Note (Fixture Selection)
In higher ceilings (4–6m):
- larger fixtures like AR111
- combined with faisceau 24°
provide better intensity than standard GU10 lamps.
Real Project Examples
Retail
- 24° → product focus
- 36° → background
Hotel Lobby
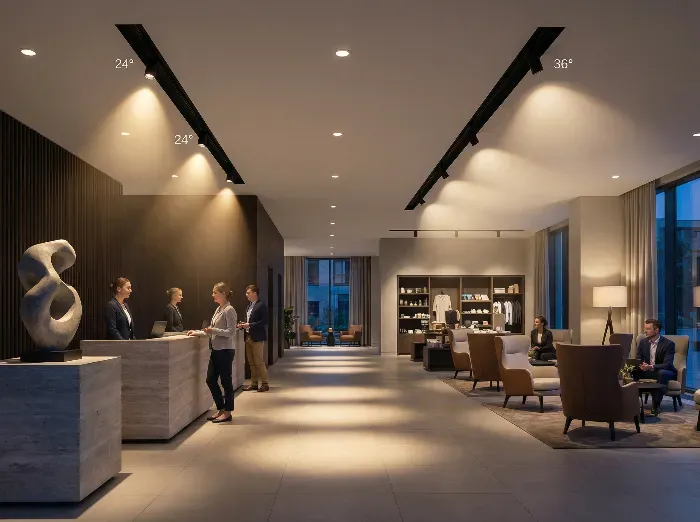
- 36° grid for floor
- 24° for architectural features
Galerie
- 24° for artwork
- 36° for ambient
Combining both angles delivers optimal results.
Common Mistakes When Choosing Beam Angles
- Using 36° for high ceilings
- Using only one beam angle
- Ignoring spacing rules
- Not simulating lighting
Solution:
- use Dialux / Relux
- verify beam angle before installation
FAQ: 24° vs 36° Beam Angle
Which is better for 3m ceiling?
36° for general lighting.
Is 24° too narrow?
No — ideal for accent lighting.
Can I mix 24° and 36°?
Yes — standard professional approach.
Which saves more cost?
36° reduces fixture count but may reduce lighting quality.
Inventory Strategy for Distributors
For general commercial demand:
- 60% → 36° beam (general use)
- 40% → 24° beam (accent use)
This mix:
- reduces stock risk
- covers most applications
- improves turnover
Final Recommendation: How to Choose
- Need focus → choose 24°
- Need coverage → choose 36°
- Need both → combine both
Perspective technique
In real projects:
- mixed beam strategy reduces cost by 20–30%
- improves lighting performance
- minimizes rework
Conclusion: Business Value
Choosing the right beam angle:
- reduces installation cost
- improves lighting quality
- avoids rework
- enhances long-term performance
24° = precision lighting tool
36° = efficiency lighting tool
Planning a commercial lighting project?
Our engineering team can help you:
- select beam angles
- optimize spacing
- simulate lighting
to avoid costly mistakes before installation.