簡潔な回答:24° vs 36° — どちらが優れているか?

- 24°ビーム → より高い強度、集中照明、強いコントラスト
- 36°ビーム → より広い照射範囲、より均一な照度、少ない器具数
高さ3mでは、36°はカバー 約50~70%広い面積 24°よりも
結論:
使用 アクセント照明には24°, 、および 一般照明には36° ほとんどの商業プロジェクトで。.
要点まとめ
- 24° = 高照度 + 強い集中光
- 36° = 広いカバレッジ + より良い均一性
- 24°は製品の視認性を高める
- 36°は器具数を削減
- 両方を組み合わせることで最高の結果が得られます
24°と36°が最もよく使われるビーム角である理由
現場の現実
商業環境(小売、ホスピタリティ)では:
- 天井高は一般的に範囲 2.5~4m
- 設置時間は限られています
調達は標準化されなければならない
24°と36°が最も実用的で広く利用可能な選択肢です。.
技術的説明
IESビーム分類によると:
- 24° → スポットビーム(<30°)
36° → ナロー・フラッド(30–40°)
これらの角度は以下の間の最適なバランスを提供します:
- 光強度
- 照射範囲
- 間隔の柔軟性
メーカー直販の視点
大規模なホスピタリティプロジェクトでは:
- 以上 注文の60% 24°または36°である
- トラックシステムおよび調光制御との互換性のため
24° vs 36°:一目でわかる主な違い
| 特徴 | 24°ビーム | 36°ビーム |
|---|---|---|
| ビームスプレッド | 狭角 | 中程度 |
| 照度 | 高い | 中程度 |
| カバレッジ | 小 | 大 |
| 均一性 | 低い | より高い |
| 器具数量 | より多い | 少ない |
| 最適用途 | アクセント照明 | 一般照明 |
影の品質:視覚的な違いの鍵
ビーム角は明るさだけでなく、 物体の見え方.
- 24°ビーム → シャープで明確な影
- 36°ビーム → 柔らかく拡散した影
実用的な影響:
- 24° → 理想的な用途: 宝飾品、時計、質感のある素材
36° → より適している 衣料品、接客業、環境照明
重要な洞察:
狭いビームは深みとコントラストを生み、広いビームは視覚的快適性を向上させます。.
ビーム直径の計算式(設計ツール)
ビーム幅計算
ビーム幅 = 2 × 設置高さ × tan(ビーム角度 ÷ 2)
例(天井高3m)
- 24° → 直径約1.27m
36° → 〜1.95m直径
36°は大幅に広い照射範囲を提供します。.
参考(測光試験):
https://www.ies.org/standards/lm-79/
ビーム広がり比較(カバレッジの差)
| 高さ | 24° カバレッジ | 36° 照射範囲 |
|---|---|---|
| 2.5m | 〜1.06m | 約1.62m |
| 3m | 約1.27m | 〜1.95m |
重要な洞察:
ビーム角のわずかな変化が照明分布に大きな差を生みます。.
照度比較:どちらが明るいですか?

同一ルーメン出力の場合:
- 24° → 集中 → 高い照度
- 36° → 拡散 → 低い照度
例(800lm @ 3m)
- 24° → 約1800ルクス
- 36° → 〜900ルクス
CBCP(中心光束光度)
CBCPはビーム中心のピーク強度を測定します。.
- 24°は通常、 30〜50%高いCBCPを提供
より強い視覚的焦点を生み出す
小売照明では、高いCBCPにより商品がより明確に際立ちます。.
参照:
https://cie.co.at/publications
Spacing Differences in Real Installations
Based on IES guidelines:
https://www.ies.org/handbook
| 高さ | 24° Spacing | 36° Spacing |
|---|---|---|
| 2.5m | ~2.0m | ~3.0m |
| 3m | ~2.4m | ~3.6m |
実用的な影響:
- 36° reduces fixture count by 30–40%
- lowers installation and wiring cost
- improves overall uniformity
Warning: Beam Angle vs Ceiling Height
If ceiling height exceeds 3.5m:
- 36° beams may not deliver sufficient lux
- lighting becomes flat and underpowered
Recommendation:
- 使用 24° or narrower beams
- especially for accent or vertical lighting
This is one of the most common mistakes in commercial projects.
Manufacturer Insight: Common Real-World Mistake
In many retail projects:
Clients choose 36° beams to reduce fixture quantity.
Result:
- poor contrast
- weak product focus
- reduced visual impact
Our recommendation:
- 使用 24° beams for key areas
- combine with 36° for ambient lighting
Glare Control Consideration
- 24° beams usually offer better glare control
36° beams may produce more spill light if optics are poor
High-quality lens design is critical.
When to Use 24° Beam Angle
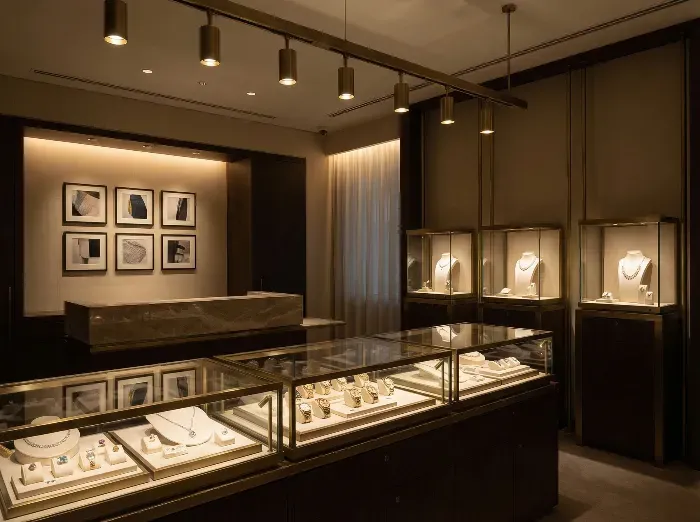
Use 24° when you need:
- accent lighting
- high contrast
- focused illumination
Applications:
- retail displays
- artwork lighting
- reception areas
Target: >1000 lux
When to Use 36° Beam Angle
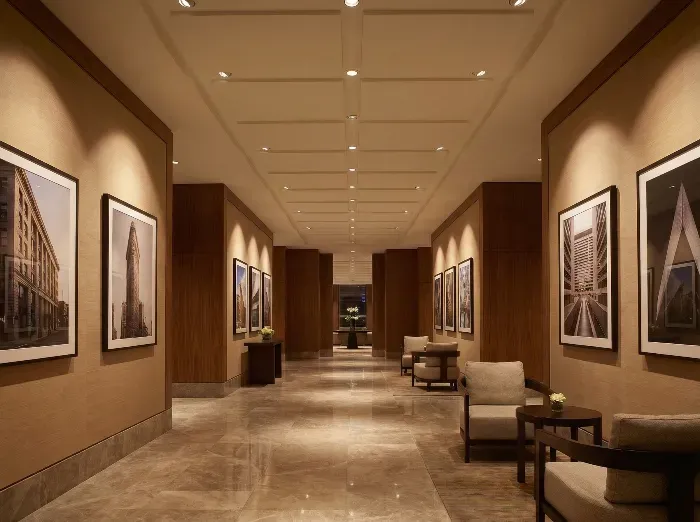
Use 36° when you need:
- general lighting
- uniform distribution
- fewer fixtures
Applications:
- corridors
- hotel lobbies
- open commercial areas
Target: 500–800 lux
Application Note (Fixture Selection)
In higher ceilings (4–6m):
- larger fixtures like AR111
- combined with 24°ビーム
provide better intensity than standard GU10 lamps.
Real Project Examples
Retail
- 24° → product focus
- 36° → background
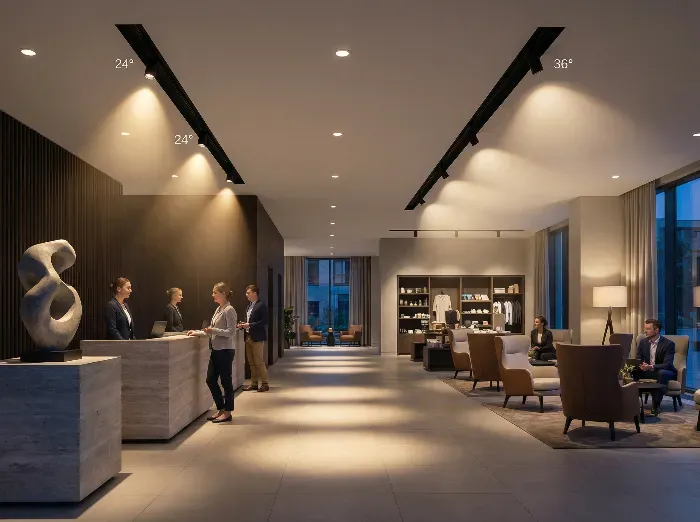
Hotel Lobby
- 36° grid for floor
- 24° for architectural features
ギャラリー
- 24° for artwork
- 36° for ambient
Combining both angles delivers optimal results.
Common Mistakes When Choosing Beam Angles
- Using 36° for high ceilings
- Using only one beam angle
- Ignoring spacing rules
- Not simulating lighting
Solution:
- use Dialux / Relux
- verify beam angle before installation
FAQ: 24° vs 36° Beam Angle
Which is better for 3m ceiling?
36° for general lighting.
Is 24° too narrow?
No — ideal for accent lighting.
Can I mix 24° and 36°?
Yes — standard professional approach.
Which saves more cost?
36° reduces fixture count but may reduce lighting quality.
Inventory Strategy for Distributors
For general commercial demand:
- 60% → 36° beam (general use)
- 40% → 24° beam (accent use)
This mix:
- reduces stock risk
- covers most applications
- improves turnover
Final Recommendation: How to Choose
- Need focus → choose 24°
- Need coverage → choose 36°
- Need both → combine both
エンジニアリング的洞察
In real projects:
- mixed beam strategy reduces cost by 20–30%
- improves lighting performance
- minimizes rework
Conclusion: Business Value
Choosing the right beam angle:
- reduces installation cost
- improves lighting quality
- avoids rework
- enhances long-term performance
24° = precision lighting tool
36° = efficiency lighting tool
Planning a commercial lighting project?
Our engineering team can help you:
- select beam angles
- optimize spacing
- simulate lighting
to avoid costly mistakes before installation.