如何为建筑照明选择正确的LED光束角:GU10、MR16和AR111指南
墙面不均匀。地面出现光斑。人眼感到眩光。.
建筑项目中大多数“糟糕照明”问题都可归结为一点:错误的光束角。.
对于像GU10、MR16和AR111这样的建筑聚光灯,光束角决定了光线的去向、在表面上的强度表现以及实际需要的灯具数量。选择正确,您就能以更少的瓦数和更少的灯具获得清晰、有设计感的光效;选择错误,您将面临返工、投诉和能源浪费的代价。.
本指南将介绍建筑工作中光束角的实际应用——它们是什么,在不同安装高度下的表现,以及如何在实际项目中正确选择,不涉及任何特定品牌。.
1. 光束角基础——您实际在指定什么

1.1 什么是光束角?
在建筑照明中,, 光束角 定义为光强降至一半时两个方向之间的夹角 最大值的50% 在光束中心。这是IES和CIE光度学中用于光束分布的定义。.
(参见IES TM-15和CIE关于光束分布定义的文件:
——照明工程协会: https://ies.org
– 国际照明委员会(CIE): https://cie.co.at)
简单来说:光束角定义了光锥的紧聚或宽广程度。.
- 窄光束(≈10–20°): 狭小区域,高密度集中。.
- 中等光束(≈24–40°): 典型的重点或任务光束。.
- 宽光束(≈60–120°): 泛光或通用环境光。.
许多制造商还发布 场角, ,通常以峰值强度的10%处测量。场角始终比光束角更宽,更能体现光的“柔和边缘”。.
1.2 光束角与表面照度
对于给定的流明封装,, 窄光束提供更高的照度 在目标表面上;宽光束将相同流明分布在更大区域。.
在固定安装高度下,您可以估算光束在地面或墙面上的直径:
光束直径 ≈ 2 ×(安装高度)× tan(光束角 ÷ 2)
您无需在现场进行三角计算——大多数照明计算软件(Dialux、Relux、AGi32)使用完整的IES或EULUMDAT文件自动包含此功能。但理解这种关系有助于您直观检验结果。.
1.3 典型光束角范围
不同的灯具和模块自然倾向于处于某些范围:
| 分类 | 典型光束角 | 典型应用场景 |
|---|---|---|
| 极窄聚光 | 8–15° | 高天花板装饰、立柱、雕塑 |
| 窄聚光 | 15–24° | 物品重点,零售亮点 |
| 聚光 | 24–36° | 通用重点照明,特色墙面 |
| 泛光 | 36–60° | 小房间、流通空间 |
| 宽泛泛光 | 60–90° | 低天花板环境光 |
| 极宽/漫射 | 90–120° | 间接或漫射一般照明 |
这些范围与许多商业光度学库以及IES照明手册对光束类型的分类方式保持一致。.
2. 光束角在建筑照明中的重要性

2.1 美学与构图
建筑照明更注重的是 亮度分布的位置:
- 窄光束 创建 对比度 与聚焦:壁龛墙面、艺术品、石材纹理、特色壁龛。.
- 中等光束 划分区域:餐桌、座位区、展示区。.
- 宽光束 构建亮度基础层和视觉安全层。.
人类视觉系统对视野中的对比度和亮斑高度敏感。即使平均照度水平正确,不当的光束选择也是最快导致眩光和视觉不适的途径之一。.
诸如 EN 12464-1 对于室内工作场所,既强调照度水平(勒克斯),也注重 均匀度 对于视觉舒适度与安全性:
https://standards.iteh.ai/catalog/standards/cen/7e8f4fab-2f27-4ac5-bdb9-53e97961e84a/en-12464-1-2021
2.2 能源与灯具数量
光束角度直接影响:
- 您需要多少套灯具 以达到所需的勒克斯值。.
- 每瓦电能的利用效率 集中在实际目标上(地板、产品、艺术品、立面),而非散射到天花板和空白墙壁上。.
选择与任务相匹配的角度通常能让您:
- 减少过度照明与 降低连接负载.
- 避免后期添加额外灯具来“填补暗区”。”
2.3 眩光与视觉舒适度
眩光受以下因素影响: 视野中的亮度, 、安装高度和方向。随意指向人眼高度的窄光束很容易超过舒适度阈值。.
例如 统一眩光值(UGR), 由国际照明委员会(CIE)定义,用于评估室内环境中的不适眩光:
https://cie.co.at/publications/discomfort-glare-interior-lighting
光束角未直接出现在UGR公式中,但会影响 表观亮度 和 明亮区域的尺寸, ,这些因素对结果有显著影响。为降低眩光:
- 避免在低安装高度使用窄光束并横跨座位区照射。.
- 当灯具处于直接视线内时,使用更宽的光束或带遮光罩的光学系统。.
3. 建筑应用中GU10、MR16与AR111的对比
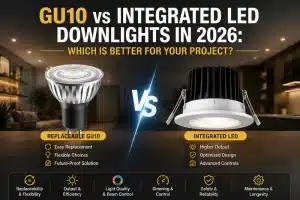
建筑射灯照明中最常见的三种规格系列—— GU10、MR16和AR111 ——各自在光束角度、安装方式和应用场景上处于不同的理想位置。.
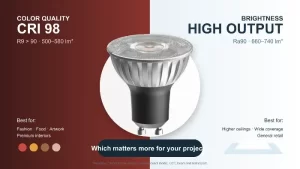
3.1 GU10 – 紧凑型市电电压射灯
- 基础: GU10旋锁式接口。.
- 功率: 通常采用4–7瓦LED替代35–50瓦卤素灯。.
- 常见光束角度: 约 24°、36°、40°,有时有 10–15° 或 60° 变体。.
典型用途:
- 中低天花板(2.5–3.5 米)重点照明。.
- 轨道灯、可调式筒灯、小型特色天花板。.
- 替换原有使用GU10卤素灯的改造项目。.
3.2 MR16——低压多用途
- 外形规格: 50毫米直径多面反射器(MR)。.
- 基础: 最常见为GU5.3接口(12伏)。.
- 光束选项: 光束角度从极窄(10–15°)到宽泛泛光(60°+),具体取决于光学设计。.
典型用途:
- 酒店及住宅嵌入式筒灯。.
- 偏好低压的重点照明场景。.
- 利用现有MR16基础设施进行改造。.
3.3 AR111 – 大口径建筑聚光灯
- 直径: 约111毫米。.
- 光束选项: 常见范围涵盖8–12°极窄光束、24–40°聚光至60°泛光。.
- 输出: 通常采用更高流明配置,适用于高层空间。.
典型用途:
- 双层挑高大堂。.
- 零售特色墙面、橱窗展示。.
- 适用于博物馆、画廊及建筑立面远距离掠射照明。.
3.4 快速对比表
| 参数 | GU10 | MR16 | AR111 |
|---|---|---|---|
| 直径 | 约50毫米 | 约50毫米 | 约 111 毫米 |
| 典型电压 | 220–240伏(或120伏) | 12伏(需搭配驱动器/变压器) | 220–240伏(或120伏),部分低压型号 |
| 典型光束范围 | 24–60° | 10–60° | 8–60° |
| 最佳用途 | 中低天花板,改造项目 | 嵌入式/可调式天花板布局 | 远投聚光,高天花板 |
| 安装方式 | 轨道式、表面式、嵌入式 | 嵌入式、轨道式 | 云台、轨道、表面多重安装 |
(几何形状与使用场景大致符合常见的MR和AR反射器标准,例如IEC灯头与灯座标准: https://webstore.iec.ch)
4. 如何选择合适的光束角度——实用方法

与其猜测,您可以将光束角度选择视为一个简单的过程:
- 定义 任务与视觉重点照明.
- 注意 安装高度与目标距离.
- 决定 目标尺寸 (桌面、画作、柱体截面、墙板)。.
- 选择光束角度以使 光束恰好覆盖目标 并带有一定重叠。.
- 通过快速计算或模拟验证。.
4.1 步骤 1 – 确定照明对象
常见建筑照明目标:
- 任务表面: 工作台、接待台、会议桌。.
- 垂直面: 特色墙面、货架、商品、艺术品。.
- 建筑元素: 立柱、拱门、壁龛、纹理。.
- 环境光层: 满足安全/标准照度水平所需的一般亮度。.
光束角应遵循 目标的尺寸与性质, ,而非灯具产品目录的顺序。.
4.2 步骤二 – 考虑安装高度
更高的安装高度需要 更宽的配光角度 以保持覆盖范围,或 更高输出/更窄光束 如果您需要从远处获得强烈的重点照明效果。.
典型建筑用途中光束角与高度的近似“经验法则”:
| 安装高度 | 小特征重点照明(0.5–1米宽) | 中等特征重点照明(1–2米宽) | 一般区域照明 |
|---|---|---|---|
| 2.5–3 米 | 15–24° | 24–36° | 36–60° |
| 3–4 米 | 10–20° | 20–30° | 40–60° |
| 4–6 米 | 8–15° | 15–24° | 30–40°(加上向上照明) |
以此为起点,再通过软件进行优化。.
4.3 步骤三 – 平衡对比度与均匀性
EN 12464-1 标准和 IES 建议均强调 平均照度 和 均匀度 在任务区域上。对于许多室内应用:
- 办公室:工作面300–500勒克斯,均匀度≥0.6。.
- 零售空间:300–1000 勒克斯,商品区域需更高对比度。.
- 博物馆/画廊:鼓励强对比度,但需谨慎控制眩光。.
参考文献:
– EN 12464-1(室内工作场所照明):参见欧洲标准列表。.
– IES照明手册: https://ies.org
实践中:
- 使用 更窄光束 用于重点照明层(与环境光对比度为 1:3–1:10)。.
- 使用 更宽光束或间接照明 用于环境照明,以避免视线在极亮与极暗区域间频繁跳跃。.
5. 按应用场景的典型配光角度选择

以下是建筑设计中常用的实际案例参考。数值仅供参考——务必通过光度数据和当地规范进行确认。.
5.1 大堂与接待处
Goals: welcoming atmosphere, clear wayfinding, emphasis on reception desk and features.
Typical choices:
Ceiling height 3–4 m
- General ambient: 40–60° MR16 or GU10 downlights.
- Desk highlight: 20–30° spots aimed at counter.
- Feature wall / logo: 15–24° spots.
| Element | Suggested Source | 光束角度 | 备注 |
|---|---|---|---|
| Reception desk | GU10 / MR16 | 20–30° | Aim from 25–35° off vertical |
| Feature wall | AR111 or MR16 | 15–24° | Overlap beams slightly |
| Ambient ceiling | GU10 / MR16 | 40–60° | Keep UGR within comfort range |
5.2 Offices and meeting rooms
Goals: compliance with lux levels, low glare, flexibility.
- Workplane targets (per EN 12464-1): 300–500 lux with good uniformity.
- Beam angle is usually medium to wide; accent layers are optional.
Typical:
- 60–90° beams in recessed or track luminaires for general lighting.
- Narrow accents (24–36°) only on specific surfaces (whiteboards, artwork).
5.3 Retail and hospitality
Goals: strong contrast on products, comfortable ambient for customers.
- Merchandise: 15–30° beams (GU10, MR16, AR111) depending on mounting height.
- Ambient: 40–60° beams, often with softer diffuse optics.
| Area | 安装高度 | Recommended Beam | 类型 |
|---|---|---|---|
| Wall bays | 3 m | 15–24° | GU10 / AR111 |
| Central displays | 3–4 米 | 20–30° | MR16 / AR111 |
| General ambient | 2.8–3.2 m | 40–60° | MR16 / panel |
Lighting research (e.g., IES retail lighting guidance and CIE technical reports on museum/retail lighting) shows that vertical illuminance and contrast significantly influence perceived brightness and merchandise appeal:
– IES RP-2 (Lighting for retail spaces): https://ies.org
– CIE publications on lighting for museums and galleries: https://cie.co.at
5.4 Museums and galleries
Goals: precise highlighting, controlled contrast, protection of sensitive materials.
- Narrow beams (8–15°) for small objects.
- 15–24° for paintings and large framed works.
- Strict glare control to avoid reflected highlights on glass.
Beam angle works together with illuminance limits 和 spectral control informed by conservation guidelines (e.g., CIE 157 and museum lighting recommendations).
5.5 Facades and exterior accents
Goals: sculpt the building at night, avoid light trespass and sky glow.
- AR111 or dedicated outdoor spot modules used with 8–40° beams for columns, pilasters and verticals.
- 30–60° beams for general wall washing – sometimes asymmetric beams or grazing optics.
For exterior lighting, reference standards like CIE 150 (Guide on the Limitation of the Effects of Obtrusive Light):
https://cie.co.at/publications/guide-limitation-effects-obtrusive-light-outdoor-lighting-installations-2nd-edition
6. Common Mistakes in Beam Angle Selection (and How to Avoid Them)
Mistake 1 – Designing by lumen, not by task
Selecting fixtures only by lumen output, without considering beam angle, often leads to:
- Overlit hot spots directly under fixtures.
- Dark patches between fittings.
Fix: always start from the target area 和 required illuminance, then choose beam angle and lumen package together.
Mistake 2 – Ignoring height and offset
Using the same beam angle for 2.5 m and 5 m ceiling heights gives completely different results:
- At double the height, the same beam covers roughly twice the diameter and delivers about ¼ of the lux (inverse-square behaviour of illuminance).
Fix: adjust beam angle or output according to mounting height, and verify with quick calculations or software.
Mistake 3 – Overusing very narrow beams
Very narrow beams look powerful in a dark sample room but can be:
- Unforgiving to aiming errors.
- Highly glaring if within normal viewing angles.
Fix: reserve 8–15° beams for high ceilings or very discrete accents where you can carefully aim and shield; otherwise start around 20–30° for accent work.
Mistake 4 – Mixing incompatible distributions
Even with the same nominal beam angle, different optics can have very different:
- Peak-to-field ratios (strong centre vs soft centre).
- Spill light and glare behaviour.
Fix: for critical spaces, use the same optical family or photometry from a single range so distributions blend well. Always read the intensity distribution curves in the IES/EULUMDAT files.
Mistake 5 – No attention to vertical illuminance
Designs that only hit the horizontal lux targets (on floors or desks) can feel “flat”.
Visual brightness in architecture is driven heavily by vertical surfaces – walls, faces, merchandise. Many standards and guides (IES, CIE) now emphasise vertical illuminance for perception and safety (e.g., for faces in offices and schools).
Fix: allocate beam angles and aiming so that walls and vertical elements receive adequate light. This often means using medium beams aimed at walls in addition to general downlighting.
7. A Simple Workflow for Specifying Beam Angles
For architectural projects using GU10, MR16 or AR111, you can adopt a consistent workflow:
List spaces and tasks
- For each room/zone, note use, ceiling height, key surfaces (tables, walls, displays).
Set lighting targets
- Use EN 12464-1, IES recommendations or local standards to define target lux and uniformity for each area.
Choose lamp family and mounting
- GU10 for compact retrofits and low ceilings.
- MR16 for flexible recessed schemes.
- AR111 for high ceilings or long throws.
Select provisional beam angles
- Use the height/beam tables in this guide as starting points.
- Decide which surfaces are accent vs ambient.
Run quick calculations
- Load IES/EULUMDAT files into Dialux, Relux, AGi32 or similar.
- Adjust beam angles and aiming until vertical and horizontal lux targets and contrast ratios are acceptable.
Check glare and comfort
- For office- and workplace-type areas, verify UGR and uniformity against EN 12464-1 and CIE guidelines.
- Adjust mounting and optics if UGR is too high.
Mock up critical areas
- For high-value spaces (entrance, feature walls, flagship retail), build a small on-site or showroom mockup with candidate beam angles to validate the design visually.
Document choices clearly
On drawings and schedules, include:
- Lamp type (GU10 / MR16 / AR111)
- Beam angle (e.g., 24°, 36°)
- Mounting height and aiming notes
- This avoids substitutions that accidentally change beam behaviour.
结论
Beam angle is one of the most powerful – and most misunderstood – tools in architectural lighting.
When you treat GU10, MR16 and AR111 not just as “lamp types” but as beam delivery tools, you can:
- Shape spaces with intentional contrast.
- Hit lux and uniformity targets with fewer watts and fewer fittings.
- Reduce glare and visual fatigue for occupants.
- Avoid expensive re-aiming and retrofits after handover.
Start from the task, respect the physics of height and distribution, and use standards and photometric data as your reference. With that approach, beam angle selection becomes a clear, repeatable part of your design process instead of guesswork – and your projects will look and perform better for it.