Como Escolher o Ângulo de Feixe LED Correto para Iluminação Arquitetónica: Guia GU10, MR16 & AR111
Paredes irregulares. Hot spots no chão. Brilho nos olhos das pessoas.
A maioria dos problemas de “má iluminação” em projetos arquitetónicos resume-se a uma coisa: o ângulo de feixe errado.
Para spots arquitetónicos como GU10, MR16 e AR111, o ângulo do feixe determina para onde vai a luz, quão forte parece na superfície e quantos aparelhos são realmente necessários. Acertar significa obter luz limpa e intencional com menos watts e menos luminárias. Errar implica pagar com retrabalho, reclamações e desperdício energético.
Este guia percorre o lado prático dos ângulos de feixe para trabalhos arquitetónicos – o que são, como se comportam a diferentes alturas de montagem e como escolher corretamente para projetos reais, sem referir marcas específicas.
1. Noções Básicas de Ângulo de Feixe – O Que Está Realmente a Especificar

1.1 O que é o ângulo de feixe?
Na iluminação arquitetónica, ângulo do feixe é definido como o ângulo entre as duas direções onde a intensidade luminosa cai para 50% do máximo no centro do feixe. Essa é a definição usada na fotometria IES e CIE para distribuições de feixe.
(Consulte as publicações IES TM-15 e CIE sobre definições de distribuição do feixe:
– Illuminating Engineering Society: https://ies.org
– Comissão Internacional de Iluminação (CIE): https://cie.co.at)
Em termos simples: o ângulo do feixe define quão estreito ou amplo é o cone de luz.
- Feixe estreito (≈10–20°): spot apertado, alta intensidade numa área pequena.
- Feixe médio (≈24–40°): feixe de destaque ou tarefa típico.
- Feixe largo (≈60–120°): flood ou ambiente geral.
Muitos fabricantes também publicam ângulo de campo, tipicamente medido a 10% da intensidade de pico. O ângulo de campo é sempre mais amplo que o ângulo do feixe e dá mais informações sobre a “borda suave” da luz.
1.2 Ângulo do feixe vs. nível de luz na superfície
Para um determinado pacote de lúmens, feixes estreitos fornecem maior lux na superfície alvo; feixes largos espalham os mesmos lúmens por uma área maior.
A uma altura de montagem fixa, pode-se aproximar o diâmetro do feixe no chão ou na parede:
Diâmetro do feixe ≈ 2 × (altura de montagem) × tan(ângulo do feixe ÷ 2)
Não precisa de fazer trigonometria no local – a maioria do software de cálculo de iluminação (Dialux, Relux, AGi32) incorpora isto automaticamente usando ficheiros IES ou EULUMDAT completos. Mas compreender a relação ajuda a verificar os resultados intuitivamente.
1.3 Intervalos típicos de ângulo de feixe
As diferentes lâmpadas e módulos tendem naturalmente a situar-se em determinadas faixas:
| Classificação | Ângulo de Feixe Típico | Caso de Uso Típico |
|---|---|---|
| Spot muito estreito | 8–15° | Realces em tetos altos, colunas, esculturas |
| Spot estreito | 15–24° | Realce de objetos, destaques em retalho |
| Spot | 24–36° | Realce geral, paredes de destaque |
| Flood | 36–60° | Pequenas divisões, espaços de circulação |
| Flood largo | 60–90° | Ambiente de teto baixo |
| Muito amplo / difuso | 90–120° | Iluminação geral indireta ou difusa |
Estas faixas são consistentes com muitas bibliotecas fotométricas comerciais e com a forma como o Manual de Iluminação IES categoriza os tipos de feixe.
2. Por que o Ângulo do Feixe Importa na Iluminação Arquitetónica

2.1 Estética e composição
A iluminação arquitetónica é menos sobre “lúmens suficientes” e mais sobre onde a luminância é colocada:
- Feixes estreitos criar contraste e foco: paredes de nicho, obras de arte, textura em pedra, nichos de destaque.
- Feixes médios definir zonas: mesas, áreas de assento, expositores.
- Feixes largos construir a camada base de brilho e segurança visual.
O sistema visual humano é altamente sensível ao contraste e a manchas brilhantes no campo de visão. A má seleção do feixe é uma das formas mais rápidas de criar encandeamento e desconforto visual, mesmo que o nível médio de lux esteja correto.
Normas como EN 12464-1 para locais de trabalho interiores enfatizam tanto os níveis de iluminância (lux) como uniformidade para conforto visual e segurança:
https://standards.iteh.ai/catalog/standards/cen/7e8f4fab-2f27-4ac5-bdb9-53e97961e84a/en-12464-1-2021
2.2 Energia e número de luminárias
O ângulo do feixe impacta diretamente:
- Quantas luminárias precisa para atingir o lux necessário.
- A eficiência com que cada watt é utilizado no alvo real (chão, produto, obra de arte, fachada) em vez de se espalhar para tetos e paredes vazias.
Escolher um ângulo que corresponda à tarefa normalmente permite-lhe:
- Reduzir a sobreiluminação e reduzir a carga conectada.
- Evite adicionar luminárias extras posteriormente para “preencher pontos escuros”.”
2.3 Ofuscamento e conforto visual
O encandeamento é influenciado por luminância no campo de visão, altura de montagem e direção. Feixes estreitos direcionados descuidadamente ao nível dos olhos podem facilmente exceder os limiares de conforto.
Métricas como Classificação Unificada de Ofuscamento (UGR), definida pela CIE, são utilizadas para avaliar o desconforto por ofuscamento em ambientes interiores:
https://cie.co.at/publications/discomfort-glare-interior-lighting
O ângulo do feixe não aparece diretamente na fórmula UGR, mas afeta o luminância aparente e tamanho da área brilhante, que influenciam fortemente o resultado. Para baixo ofuscamento:
- Evite feixes estreitos a baixas alturas de montagem direcionados através de áreas de assento.
- Utilize feixes mais amplos ou óticas blindadas quando as luminárias estão em visão direta.
3. Comparação de GU10, MR16 e AR111 para uso arquitetónico
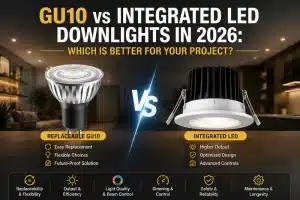
As três famílias de formatos mais comuns para iluminação de destaque arquitetónico – GU10, MR16 e AR111 – cada um situa-se num ponto ideal diferente de ângulo do feixe, estilo de montagem e aplicação.
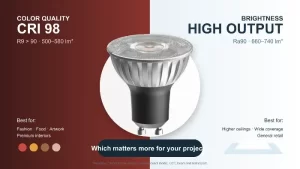
3.1 GU10 – Spot compacto de tensão da rede
- Base: GU10 com encaixe e rotação.
- Potência: Tipicamente 4–7 W LED para substituição de halogéneo de 35–50 W.
- Ângulos de feixe comuns: aproximadamente 24°, 36°, 40°, por vezes variantes de 10–15° ou 60°.
Usos típicos:
- Iluminação de destaque para tetos baixos a médios (2,5–3,5 m).
- Trilhos, downlights ajustáveis, pequenos tetos de destaque.
- Retrofits onde foram utilizados halogéneos GU10 existentes.
3.2 MR16 – Versatilidade de baixa tensão
- Formato: Refletor multifacetado (MR) de 50 mm de diâmetro.
- Base: Mais comum GU5.3 (12 V).
- Opções de feixe: de muito estreito (10–15°) a inundações amplas (60°+), dependendo da ótica.
Usos típicos:
- Downlights embutidos na hotelaria e residencial.
- Iluminação de destaque onde se prefere baixa tensão.
- Retrofits com infraestrutura MR16 existente.
3.3 AR111 – Destaque arquitetónico de grande abertura
- Diâmetro: ~111 mm.
- Opções de feixe: faixas comuns de 8–12° muito estreitas, passando por spots de 24–40°, até floods de 60°.
- Saída: frequentemente pacotes de lúmens mais elevados adequados a espaços altos.
Usos típicos:
- Átrios de dupla altura.
- Paredes de destaque no retalho, montras.
- Museu, galeria e iluminação rasante de fachada a partir de lançamentos mais longos.
3.4 Tabela de comparação rápida
| Parâmetro | GU10 | MR16 | AR111 |
|---|---|---|---|
| Diâmetro | ~50 mm | ~50 mm | ~111 mm |
| Tensão típica | 220–240 V (ou 120 V) | 12 V (com driver/transformador) | 220–240 V (ou 120 V), alguns LV |
| Gama típica de feixe | 24–60° | 10–60° | 8–60° |
| Melhor uso | Tetos baixos/médios, retrofits | Layouts de teto embutidos/ajustáveis | Destaques de longo alcance, tetos altos |
| Montagem | Trilho, superfície, embutido | Embutido, trilho | Cardã, trilhos, múltiplos de superfície |
(Geometrias e casos de uso estão amplamente alinhados com os padrões comuns de refletores MR e AR, por exemplo, padrões de soquetes e suportes de lâmpadas IEC: https://webstore.iec.ch)
4. Como Selecionar o Ângulo de Feixe Correto – Um Método Prático

Em vez de adivinhar, pode tratar a seleção do ângulo do feixe como um processo simples:
- Definir tarefa e ênfase visual.
- Nota altura de montagem e distância ao alvo.
- Decida tamanho alvo (mesa, pintura, secção de coluna, painel de parede).
- Escolha o ângulo de feixe para que o o feixe cobre apenas o alvo com um pouco de sobreposição.
- Verify in a quick calculation or simulation.
4.1 Step 1 – Decide what you are lighting
Common architectural lighting goals:
- Task surfaces: worktops, reception desks, conference tables.
- Verticals: feature walls, shelving, merchandise, artwork.
- Architectural elements: columns, arches, niches, textures.
- Ambient layer: general brightness to meet safety/standard lux levels.
Beam angle should follow the size and nature of the target, not the fixture catalogue order.
4.2 Step 2 – Account for mounting height
Higher mounting heights require either wider beams to maintain coverage, or higher output / narrower beams if you need strong accents from a distance.
Approximate “rule of thumb” beams vs height for typical architectural use:
| Mounting Height | Accent on Small Feature (0.5–1 m wide) | Accent on Medium Feature (1–2 m wide) | General Area Lighting |
|---|---|---|---|
| 2.5–3 m | 15–24° | 24–36° | 36–60° |
| 3–4 m | 10–20° | 20–30° | 40–60° |
| 4–6 m | 8–15° | 15–24° | 30–40° (plus uplight) |
Use these as starting points, then refine in software.
4.3 Step 3 – Balance contrast vs uniformity
Standards such as EN 12464-1 and IES recommendations emphasise both average illuminance e uniformidade on task areas. For many interior applications:
- Offices: 300–500 lux on workplanes, with uniformity ≥ 0.6.
- Retail: 300–1000 lux, with higher contrast on merchandise.
- Museums/galleries: strong contrast is encouraged, but with careful glare control.
Referências:
– EN 12464-1 (Indoor workplace lighting): see European standards listings.
– IES Lighting Handbook: https://ies.org
In practice:
- Utilizar narrower beams for highlight layers (1:3–1:10 contrast vs ambient).
- Utilizar wider beams or indirect light for ambient, so that the eye isn’t constantly jumping between very bright and very dark areas.
5. Typical Beam Angle Choices by Application

Below are practical examples that specifiers often converge on in architectural work. Numbers are indicative – always confirm with photometry and local codes.
5.1 Lobby and reception
Goals: welcoming atmosphere, clear wayfinding, emphasis on reception desk and features.
Typical choices:
Ceiling height 3–4 m
- General ambient: 40–60° MR16 or GU10 downlights.
- Desk highlight: 20–30° spots aimed at counter.
- Feature wall / logo: 15–24° spots.
| Element | Suggested Source | Ângulo do feixe | Notas |
|---|---|---|---|
| Reception desk | GU10 / MR16 | 20–30° | Aim from 25–35° off vertical |
| Feature wall | AR111 or MR16 | 15–24° | Overlap beams slightly |
| Ambient ceiling | GU10 / MR16 | 40–60° | Keep UGR within comfort range |
5.2 Offices and meeting rooms
Goals: compliance with lux levels, low glare, flexibility.
- Workplane targets (per EN 12464-1): 300–500 lux with good uniformity.
- Beam angle is usually medium to wide; accent layers are optional.
Typical:
- 60–90° beams in recessed or track luminaires for general lighting.
- Narrow accents (24–36°) only on specific surfaces (whiteboards, artwork).
5.3 Retail and hospitality
Goals: strong contrast on products, comfortable ambient for customers.
- Merchandise: 15–30° beams (GU10, MR16, AR111) depending on mounting height.
- Ambient: 40–60° beams, often with softer diffuse optics.
| Area | Mounting Height | Recommended Beam | Type |
|---|---|---|---|
| Wall bays | 3 m | 15–24° | GU10 / AR111 |
| Central displays | 3–4 m | 20–30° | MR16 / AR111 |
| General ambient | 2.8–3.2 m | 40–60° | MR16 / panel |
Lighting research (e.g., IES retail lighting guidance and CIE technical reports on museum/retail lighting) shows that vertical illuminance and contrast significantly influence perceived brightness and merchandise appeal:
– IES RP-2 (Lighting for retail spaces): https://ies.org
– CIE publications on lighting for museums and galleries: https://cie.co.at
5.4 Museums and galleries
Goals: precise highlighting, controlled contrast, protection of sensitive materials.
- Narrow beams (8–15°) for small objects.
- 15–24° for paintings and large framed works.
- Strict glare control to avoid reflected highlights on glass.
Beam angle works together with illuminance limits e spectral control informed by conservation guidelines (e.g., CIE 157 and museum lighting recommendations).
5.5 Facades and exterior accents
Goals: sculpt the building at night, avoid light trespass and sky glow.
- AR111 or dedicated outdoor spot modules used with 8–40° beams for columns, pilasters and verticals.
- 30–60° beams for general wall washing – sometimes asymmetric beams or grazing optics.
For exterior lighting, reference standards like CIE 150 (Guide on the Limitation of the Effects of Obtrusive Light):
https://cie.co.at/publications/guide-limitation-effects-obtrusive-light-outdoor-lighting-installations-2nd-edition
6. Common Mistakes in Beam Angle Selection (and How to Avoid Them)
Mistake 1 – Designing by lumen, not by task
Selecting fixtures only by lumen output, without considering beam angle, often leads to:
- Overlit hot spots directly under fixtures.
- Dark patches between fittings.
Fix: always start from the target area e required illuminance, then choose beam angle and lumen package together.
Mistake 2 – Ignoring height and offset
Using the same beam angle for 2.5 m and 5 m ceiling heights gives completely different results:
- At double the height, the same beam covers roughly twice the diameter and delivers about ¼ of the lux (inverse-square behaviour of illuminance).
Fix: adjust beam angle or output according to mounting height, and verify with quick calculations or software.
Mistake 3 – Overusing very narrow beams
Very narrow beams look powerful in a dark sample room but can be:
- Unforgiving to aiming errors.
- Highly glaring if within normal viewing angles.
Fix: reserve 8–15° beams for high ceilings or very discrete accents where you can carefully aim and shield; otherwise start around 20–30° for accent work.
Mistake 4 – Mixing incompatible distributions
Even with the same nominal beam angle, different optics can have very different:
- Peak-to-field ratios (strong centre vs soft centre).
- Spill light and glare behaviour.
Fix: for critical spaces, use the same optical family or photometry from a single range so distributions blend well. Always read the intensity distribution curves in the IES/EULUMDAT files.
Mistake 5 – No attention to vertical illuminance
Designs that only hit the horizontal lux targets (on floors or desks) can feel “flat”.
Visual brightness in architecture is driven heavily by vertical surfaces – walls, faces, merchandise. Many standards and guides (IES, CIE) now emphasise vertical illuminance for perception and safety (e.g., for faces in offices and schools).
Fix: allocate beam angles and aiming so that walls and vertical elements receive adequate light. This often means using medium beams aimed at walls in addition to general downlighting.
7. A Simple Workflow for Specifying Beam Angles
For architectural projects using GU10, MR16 or AR111, you can adopt a consistent workflow:
List spaces and tasks
- For each room/zone, note use, ceiling height, key surfaces (tables, walls, displays).
Set lighting targets
- Use EN 12464-1, IES recommendations or local standards to define target lux and uniformity for each area.
Choose lamp family and mounting
- GU10 for compact retrofits and low ceilings.
- MR16 for flexible recessed schemes.
- AR111 for high ceilings or long throws.
Select provisional beam angles
- Use the height/beam tables in this guide as starting points.
- Decide which surfaces are accent vs ambient.
Run quick calculations
- Load IES/EULUMDAT files into Dialux, Relux, AGi32 or similar.
- Adjust beam angles and aiming until vertical and horizontal lux targets and contrast ratios are acceptable.
Check glare and comfort
- For office- and workplace-type areas, verify UGR and uniformity against EN 12464-1 and CIE guidelines.
- Adjust mounting and optics if UGR is too high.
Mock up critical areas
- For high-value spaces (entrance, feature walls, flagship retail), build a small on-site or showroom mockup with candidate beam angles to validate the design visually.
Document choices clearly
On drawings and schedules, include:
- Lamp type (GU10 / MR16 / AR111)
- Beam angle (e.g., 24°, 36°)
- Mounting height and aiming notes
- This avoids substitutions that accidentally change beam behaviour.
Conclusão
Beam angle is one of the most powerful – and most misunderstood – tools in architectural lighting.
When you treat GU10, MR16 and AR111 not just as “lamp types” but as beam delivery tools, you can:
- Shape spaces with intentional contrast.
- Hit lux and uniformity targets with fewer watts and fewer fittings.
- Reduce glare and visual fatigue for occupants.
- Avoid expensive re-aiming and retrofits after handover.
Start from the task, respect the physics of height and distribution, and use standards and photometric data as your reference. With that approach, beam angle selection becomes a clear, repeatable part of your design process instead of guesswork – and your projects will look and perform better for it.