リーディングエッジ調光とトレーリングエッジ調光の解説:違い、互換性、LEDへの応用
LEDが煩わしくちらついたり、ショートしそうなブーンという音を立てたりした経験はありませんか?スマート照明システムが頭痛の種になり、時間とお金を無駄にするのは本当にイライラします。.
前端位相調光と後端位相調光は、AC波形のチョッピング方法が異なります。前端位相は古い負荷のために波形の前部を切り取り、後端位相はLEDを滑らかに制御するために波形の後部をトリミングします。互換性は、問題を避けるために適切なタイプを一致させることに懸かっています。後端位相は一般的にLEDにとって安全ですが、信頼性の高い性能のためには常に詳細を確認してください。.

LED互換性のための前縁調光と後縁調光の波形
なぜ一部の調光器は白熱灯ではうまく機能するのに、LEDでは失敗するのか疑問に思ったことがあるなら、ぜひご覧ください。技術を分解し、落とし穴を指摘し、プロジェクトに適した調光器を選ぶためのヒントを提供します。試行錯誤による頭痛からあなたを救います。.
リーディングエッジ調光とは何か?その仕組みは?
LEDを最初からチラつかせる調光器にうんざりしていませんか?古い家屋で一般的な前端位相調光は、現代の電球との互換性の問題を引き起こしがちで、文字通り暗闇に取り残されることになります。.
前縁調光は、各半サイクルの開始時にサイリスタを使用して交流波形をチョップし、電圧を早期に下げて照明を調光します。シンプルで安価ですが、高突入電流を発生させ、LEDドライバーに負荷をかける可能性があります。.
波形チョッピングの基礎
リーディングエッジ調光は、トラックと呼ばれる半導体素子に依存しています1, は、AC正弦波の正または負の半サイクルの開始時にトリガーされます。これにより先頭部分が「チョップ」され、負荷に供給される平均電圧が実質的に低下します。従来の白熱電球では、フィラメントへの加熱を弱めることで、抵抗ベースの調光を模倣します。.
しかし、ここでLEDにとって難しい点があります。トライアックがオンになった時の急激なサージは、LEDドライバーの整流器やコンデンサーを圧倒し、不安定性を引き起こす可能性があります。米国エネルギー省によると、この方法は白熱灯のような抵抗負荷向けに最適化されており、LEDの容量性負荷向けではありません(出典: energy.gov).
なぜまだ存在するのか
前端位相調光器は、予算重視のセットアップや改修工事で見かけます。安価(多くの場合$20未満)で、標準的な壁面ボックスと互換性があるからです。ホームオートメーションをいじってきた私の経験では、ハロゲンランプはまずまず扱えますが、LEDへの交換となると、問題が始まります。それは欠陥ではなく、LED以前の時代の技術とのミスマッチなのです。.
実世界でのトリガー
調光レベルは、トラックの着火角度を遅らせることで制御されます。例えば、70%の明るさには30度の遅延が設定されます。しかし、フィルタリングがないと、これは電磁干渉(EMI)を引き起こします。そのため、ユニバーサル調光器にはチョークコイルが追加されています。それでも、LEDの場合、IEEE規格(出典:)による一般的な業界ガイドラインによれば、突入電流は一時的に定常電流の10〜20倍に達することがあります。 ieee.org).
要するに、前縁調光は単純だが時代遅れで、レガシー機器には優れていますが、新しいLEDにはリスクが高いです。.
後端位相調光とは何か、そしてなぜLEDに適しているのか?
LEDが不均一に暗くなったり、基本的な調光器で過熱したりすることに不満を感じていませんか?トレーリングエッジ技術は、効率的な照明とトラブルなく調和するように設計された、よりスムーズなオペレーターとして登場します。.
後縁調光はMOSFETを使用して交流波形の終端をカットし、LEDドライバーに優しい徐々な電圧降下を提供し、ちらつきを減らし、電球寿命を延ばします。現代のセットアップに理想的です。.

後縁調光プロセスの図解
MOSFETの魔法が起こる仕組み
サイリスタとは異なり、後縁調光器はMOSFETを採用しています2 各半サイクルの終了近くでスイッチをオフにし、波形が完全に立ち上がってから末尾をトリミングします。これにより、過酷な突入を回避し、LED電源により正弦波に近い電源を供給します。.
エネルギースターのガイドラインは、これをLEDの鍵として強調し、互換性のあるシステムでは総高調波歪み(THD)を20%未満に最小化すると指摘しています(出典: energystar.gov)。その結果は?100%から1%までの、特徴的なブーンという音のない、より滑らかな調光です。.
実際に役立つLED向けの利点
ブレーキを急に踏むのではなく、アクセルを緩めるようなものと考えてください。LEDドライバーは安定した電力を得られ、部品への負担が軽減されます。私は、後端位相制御を導入することで、前端位相制御では解決できなかったちらつきを解消したプロジェクトを見てきました。コストは高め(約$30+)ですが、スマートホームやオフィスでは、その信頼性が報われます。.
互換性の優位性
トレーリングエッジは、低電圧LED用のトランスなど、誘導性負荷も扱え、EMIも少なくなります。Lutronの技術文書によると、配線を変更せずに白熱灯をLEDに改造する際の定番です。.
リーディングエッジ調光とトレーリングエッジ調光の主な技術的違い
同じ器具で一方の調光器タイプが機能し、もう一方が機能しない理由に混乱しますか?コア技術の違い(サイリスタ vs MOSFET)が大きく異なる動作を引き起こし、しばしば滑らかな照明を不具合だらけの状態に変えてしまいます。.
主な違いは、波形チョッピング(前縁 vs 後縁)、スイッチングデバイス(前縁はサイリスタ、後縁はMOSFET)、および負荷の取り扱いに帰着します。前縁調光は安価なハードウェアで抵抗負荷に適し、後縁調光は静かでより精密な制御により容量性LEDに優れています。.
前縁調光と後縁調光の比較チャート
波形とスイッチングメカニズム
前縁調光はサイリスタで立ち上がりエッジをチョップし、急峻な電圧スパイクを生成します。後縁調光はMOSFETで立ち下がりエッジをスライスし、より柔らかなカーブを実現します。この表で詳細を説明します:
| 側面 | 前端位相 | 後端位相 |
|---|---|---|
| チョッピングポイント | 半サイクルの開始時 | 半サイクルの終了 |
| デバイス | サイリスタ(双方向サイリスタ) | MOSFET(電圧制御) |
| 突入電流 | 高い(定格の最大20倍) | Low (gradual buildup) |
| Noise/EMI | Higher, needs filters | Lower, inherent suppression |
Data from NEMA standards shows leading-edge THD can exceed 50% on LEDs, vs. trailing’s 10-20%.
Load Compatibility Nuances
Leading-edge was built for incandescents—think 60W bulbs drawing steady current. LEDs, with their switch-mode power supplies, hate that spike; it causes electrolytic cap ripple. Trailing-edge mimics a resistor better, aligning with LED’s non-linear draw.
In practice, leading-edge might work initially but degrade over time—capacitors wear from surges. Trailing-edge? More stable, especially in multi-bulb runs.
Cost and Installation Factors
Leading-edge dimmers are ubiquitous and snap into old boxes, but trailing-edge often requires neutral wires for MOSFET control. Per Philips Lighting insights, this makes trailing-edge the future-proof pick for LED-heavy installs (source: lighting.philips.com).
These diffs aren’t just geeky; they explain why your setup flickers or not.
LED Compatibility: Why “Dimmable” Is Not a Guarantee
Bought "dimmable" LEDs only to watch them buzz or drop out at low levels? That label’s a tease—compatibility depends on the dimmer match, turning promised smoothness into spotty performance.
"Dimmable" LEDs are built to handle reduced voltage but aren’t universally compatible; leading-edge can work with some, yet trailing-edge is safer overall, as mismatches cause flicker or failure regardless of the bulb’s rating.

LED dimming compatibility issues visual
The "Dimmable" Label Breakdown
Manufacturers test LEDs with specific dimmers, often trailing-edge, per UL 153 standards (source: ul.com). But "dimmable" doesn’t specify type—some tolerate leading-edge’s spikes via beefier drivers, others don’t.
From my projects, budget LEDs might claim it but falter below 10% brightness due to minimum load thresholds.
Driver Design Matters
LED drivers use buck converters that need stable input; leading-edge’s chopped wave confuses them, leading to instability. Trailing-edge provides cleaner power. A DOE report notes 30% of dimming complaints stem from this mismatch (source: energy.gov).
Testing for True Fit
Don’t trust labels alone—pilot test with your dimmer. Some LEDs support both but perform best with trailing. Initial success? It might not last; heat buildup reveals cracks.
In essence, "dimmable" is a starting point, not a promise—match wisely.
Common LED Dimming Problems Caused by Wrong Dimmer Selection
Sick of LEDs that ghost at low dim or hum like a fridge on steroids? Picking the wrong dimmer type amplifies these gremlins, turning your lighting upgrade into a constant fix-it chore.
Wrong selection leads to flicker (waveform instability), audible noise (from triac arcing), and dropout (insufficient hold current)—issues fixable by switching to trailing-edge, but ignoring them risks bulb burnout.
Flicker and Instability
Flicker hits when leading-edge’s spikes overload the driver’s hold-up time, causing 120Hz pulsing visible to the eye. It’s not a defect—it’s incompatibility, per IESNA guidelines (source: ies.org).
Buzzing Noises
That whine? Triac switching noise in leading-edge, amplified by LED’s low load. Trailing-edge MOSFETs are silent. Common in 10-20% of mismatched installs, says Leviton data (source: leviton.com).
Dropout and Overheating
Below 20-30% dim, leading-edge may not maintain current, dropping light out. Drivers overheat from ripple, shortening life. Solution: match types for stability.
These aren’t LED flaws; they’re pairing pitfalls—spot ’em early.
How to Choose Between Leading-Edge and Trailing-Edge for Real Projects
Overwhelmed picking dimmers for a retrofit or new build? Mismatching can derail timelines and budgets, but nailing the choice ensures reliable, flicker-free lighting from day one.
Choose trailing-edge for LED-dominant projects due to its compatibility and low noise; stick with leading-edge only for mixed legacy loads, always testing first to mitigate risks.
Assess Your Load Type
LEDs? Go trailing—it’s designed for their behavior, reducing system risk. Incandescents or MLV transformers? Leading-edge suffices. My take: leading-edge was for old-school loads; trailing aligns with LEDs’ capacitive nature.
Factor in Environment
For quiet spaces like bedrooms, trailing-edge cuts noise. High-vibration areas? Both work, but test for EMI. Per NEC codes, ensure neutral for trailing (source: nfpa.org).
Budget and Scalability
Leading-edge is cheaper upfront but riskier long-term—initial success doesn’t guarantee stability. For bulk, trailing pays off in fewer callbacks.
Prioritize matching for enduring results.
Practical Buyer Checklist: Ensuring Dimming Compatibility Before Bulk Orders
Wary of ordering hundreds of LEDs or dimmers that clash on arrival? Rushing without checks leads to returns and delays, but a solid pre-buy routine locks in seamless integration.
Use this checklist: verify dimmer type against LED specs, test small batches, check for neutral wiring, and review warranties—trailing-edge minimizes risks for LED apps.
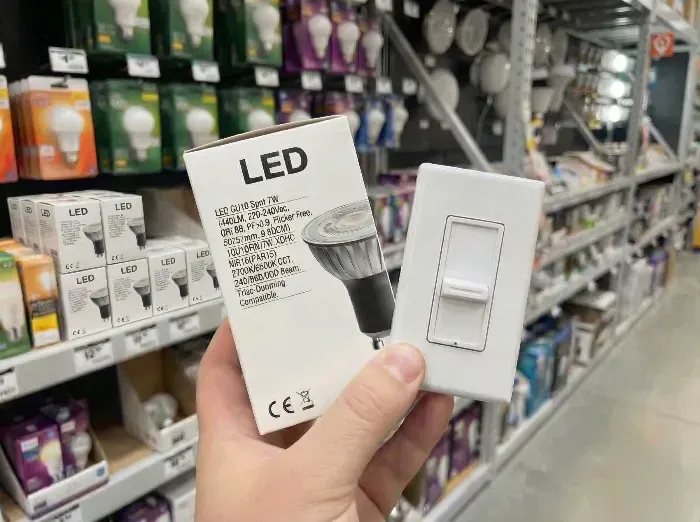
Checklist for LED dimmer buying
Step-by-Step Verification
- Spec Match: Confirm LED driver supports your dimmer (leading or trailing). Look for "universal" but prefer explicit trailing-edge nods.
- Pilot Test: Dim 5-10 units across 10-100% levels. Watch for flicker/noise—common compatibility flags, not defects.
- Wiring Check: Trailing needs neutral; leading doesn’t always. Consult install guides.
Vendor and Warranty Tips
Ask suppliers for compatibility charts—e.g., Cree’s lists trailing as preferred (source: cree.com). Some LEDs handle leading, but trailing’s lower risk wins for bulk.
Long-Term Stability
Bulk buys amplify mismatches; proper pairing ensures longevity. Stability? It’s all about that match.
結論
Grasp leading vs. trailing-edge differences to sidestep LED headaches—opt for trailing in modern setups for reliable, buzz-free dimming that lasts.